Phone App for Blind Motors: Download & Install Android/IOS App

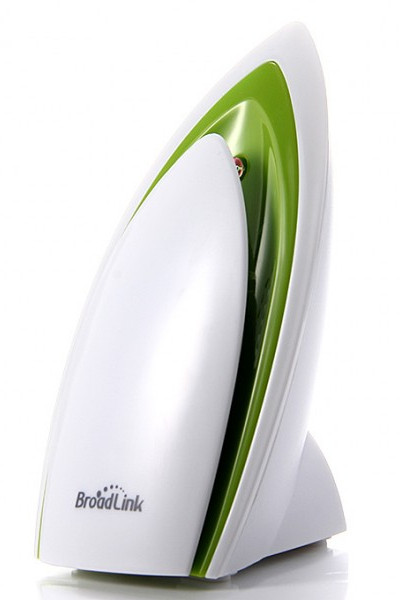
This is the third article in this series, and it is about downloading and installing the phone app for the BroadLink® smart sensor for controlling our blind motors, skylight/window openers, smart film, drapery motors, and many other devices, such as fans & LED lighting.
If you didn't see the previous article about powering up the WiFi environmental sensor, please take a moment to review that important step.
You may have already installed the BroadLink® program, if you have already installed the controller hub or security kit. In that case, please skip down to this section: Configuring the Sensor After Software Installation.
Please Note: It is important to follow these instructions sequentially to avoid any confusion.
The BroadLink® controller system has quickly become our automation system of choice for a number of reasons, not the least being the ease-of-use factor, and if you follow these instructions carefully, you will find that it is quite "user friendly".
One of the most important features is its ability to "learn" RF radio commands, which means it can directly control our blind motors and window/skylight openers, whether they are our G series radio motors and receivers, or the older R series motors. It is also an excellent IR code learner too, for controlling all your media systems, including projector screens and blackout blinds.
This also means the environmental sensor discussed in this article series can be used as a trigger to activate a motor (or any other device) when conditions change, such as a temperature/humidity increase, or a light level increase.
Buy These Products In Our Online Store
If you are interested, you can purchase these products in our DIY online automation store.
Downloading the App: Android and IOS Versions
There are 2 different ways to download and install the BroadLink® program:
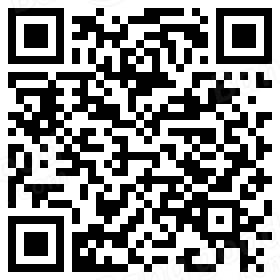
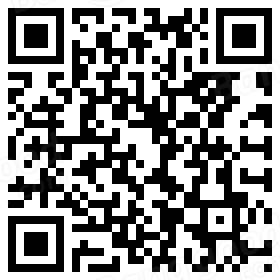
1. Scan the QR code from packing box, or from this screen to automatically download and install the software.
| Platform: | Android | IOS |
| QR Code: |

|

|
2. Visit the following links. The Android link is a direct download of the APK file, but you may have to enable downloads from unknown sources on your phone. You can also get it from the Google Play store (search for 'BroadLink'). The IOS link will take you directly to the item in the Apple store.
BroadLink® System Software: Direct Android Download Link (APK file)
BroadLink® System Software: Download Link for IOS (iTunes store)
Configuring the Sensor After Software Installation
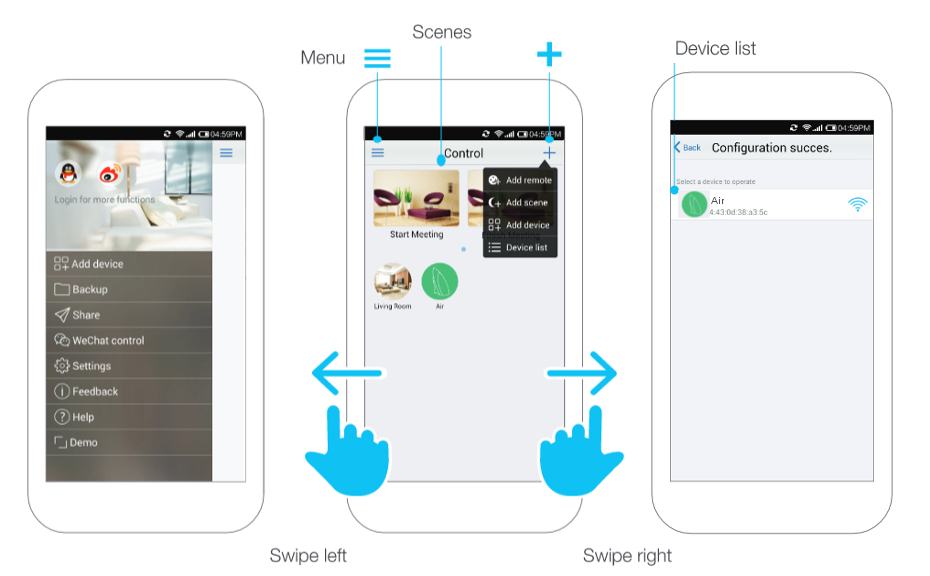
When you first open and run the software you have downloaded, you will see the opening screen on the left, in the picture below.
The program will detect that you are a first time user and switch to the 'Add Device' connection screen, shown on the right in the picture below (the 'device' is the sensor).
Depending on the type of WiFi router you have, you may be able to simply enter your WiFi ID/password credentials and it will connect automatically. If that works and you get a "successful connection" message, you can go to the next section.
If you cannot get it to connect with SmartConfig™, please see this page and use the alternative AP mode method.
After the Sensor is Successfully Connected to your WiFi Network
The sensor will also show up on the 'Device List' in the app as a green icon with a picture of the sensor as shown in the middle picture below. It will be named 'e-Sensor', but you can select it and change the name to whatever you want, as we have below. Here are the 3 main screens you will be dealing with, once the hub is connected:

The first thing to do is to check for a device firmware update. If you look at the third screen above, you'll see the eRomote device that you have added to the system. Press it once to get a sub-menu, and you'll see a Tools icon (the gear symbol at top right of screen).
Press the gear symbol and you'll see a pop-down list of options, one of them being "Device Info". Select that option, and you'll see the "Firmware Update" selection. Please check that and update your firmware if it is not current.
Please Note: Wait if you see that it is stormy outside as you do not want to interrupt that process; do it only when you have a rock-solid internet connection, otherwise you could "brick" the device and render it inoperable.
The next step will be to review the environmental sensor IFTTT event handling, as covered in the next article.
Buy These Products In Our Online Store
If you are interested, you can purchase these products in our DIY online automation store.
Articles in this series:
Part 1-Temperature and light sensitive blinds: Introduction
Part 2-Smart sensor WiFi router connection: Activate Sensor
Part 3-Environmental sensor program installation: download and install software (you are here)
Part 4-Environmental sensor IFTTT event handling
Also, see the follow-on series about our other devices:

 Shopping Cart Home - Start Here
 Remote Controls for Radio Equipped Motors
 DIY Starter Kits for Window Shades
 DIY Starter Kits for Window Openers
 ZWAVE Blind & Shade Controllers
 How To Choose the Right Blind & Shade Motor
 Select tubular Motor (Comparison table)
 Choose RollerTrol Battery & Solar Motors
 DIY Roller Blind Motors - FAQ
 How To Insert Blind Motors & Attach Brackets
 Calculate your Blind or Shade fabric Weight
 Select Tube Size for Blind Motor
 How to Insert Blind Motors Into Tube
 How to Insert Blind Motors Into Tube with Adapters
 Attach Mounting Brackets - Standard + Mini Series
 Attach Mounting Brackets - MAXI Blind Series
 How To Set Up Radio Equipped Blind & Shade Motors
 Series P Radio Remote Control Motors
 Series G Radio Remote Control Motors
 Series R Radio Remote Control Motors
 BroadLink RF/IR Hub System for Motors
 How To Set Up Window/Skylight Openers
 Introduction: Window & Skylight (K Series)
 BroadLink RF/IR Hub System for Motors
 Z-Wave Interfacing for Shade & Opener Motors
 Wired Wall Switch Control of Window Openers
 How To Use Alexa With Our Motors & Window Openers
 How To Use BroadLink Phone App Hub With Our Motors
 How To Set Up ShadeSlider Skylight or Bottom-Up Blind
 How To Retrofit RV, Boat and Motorhome Blinds
 How To Set Up Non-Radio Motors
 Operation & Travel Limits of Non-Radio Motors
 Make a Simple DC Motor Reversing Switch
 How To Set Up ZWAVE Control
 ZWAVE Controller for G Series Radio motors
 ZWAVE Door/Window Opening Detection
 ZWAVE Motion Detector with Temperature Sensing
 Motorized Window Blinds & Shades
 Motorized Dual Window Shade
 Make Motorized Blackout Blinds
 Phone-Tablet-PC Control for Motorized Blinds
 Mini Motor for Existing Shade Retrofit
 Roman Shade Retrofit
 Make a Motorized Window Opener
 Blind & Shade Motors for RV & Boats
 Make Your Own Projector Screen
 Curtain Closer: Ultimate Home Theater
 Wireless Battery Operated Drapery Motor Kit
 Make a Motorized Bottom-Up Shade
 Make a Motorized Skylight Opener
 BroadLink RF/IR Hub System for Motors
 Why Buy From US?
 Background & Mission Statement
 Customer DIY Testimonials
 Site Map - Search All Pages
 Why Buy From US?
 RollerTrol Users Forum
 Contact Page