IFTTT Phone App Example: Motorized Skylight Opener with Rain Sensor
Overview
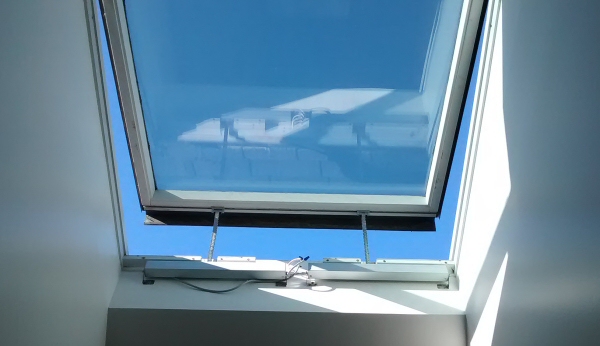
This is the second article in this series about creating an IFTTT rain sensor monitoring system for a motorized skylight opener.
We will re-purpose the alarm system by using a door/window open/close sensor as an input for the rain detector.
If you missed the previous article about the motorized skylight rain sensor components, please consider reviewing that article first.
Our preferred controller is the BroadLink® HA-RFIRW-5V automation hub phone app that controls our skylight/window openers, blind motors, smart film, drapery motors, and many other devices, such as fans and LED lights.
It is both affordable and able to control our motors directly, because it has the ability to "learn" individual RF motor control signals, including those used to open and close our skylight/window actuators.
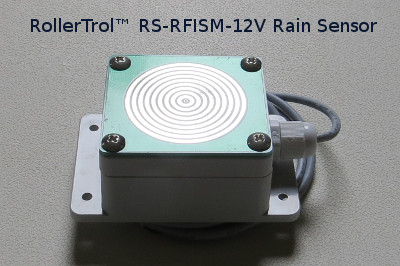 In this article we will be discussing the setup of the software that generates the IFTTT (if-this-then-that) event manager for the rain sensing system, and the inclusion process of the re-purposed door/window sensor as an input for the rain sensor.
There are 4 main hardware components to this system:
- The RS-RFISM-12V rain sensor
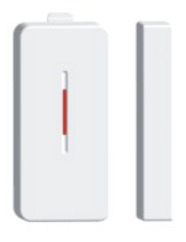
- The DW-RFISM-3VB wireless door/window open detection transmitter
- The TR-RFISMW-AC transceiver hub that contains the IFTTT event reaction program
- The HA-RFIRW-5V controller hub that activates the skylight actuator motors
The BroadLink® Control App for Android and IOS
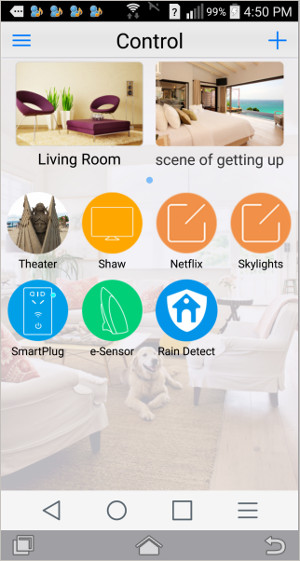 The picture to the right is a screen capture of the BroadLink® Android phone app (IOS is also available). The Android version we use is very stable and has never crashed.
This is the master home screen for the entire system, where you can see that we have created some control screens and installed various devices, including the last device icon that says "Rain Detect". Note that you can use pictures or icons as buttons that launch the various screens.
The top two images (Living Room, scene of getting up) are just default scenes to give you a place to start, where you can create an "action sequence" series of commands to do various things. For instance, the "getting up" scene may boil a kettle, open the blinds, turn up the heat, etc.
Below that, we have created a row of control screens:
- Theater (controls lights, projector, blackout blinds, cable box, Netflix streaming box, Sony audio system, HDMI switching, etc.
- Shaw (dedicated controls for cable box remote)
- Netflix (dedicated controls for Netflix streaming box)
- Skylights (dedicated controls to open and close skylights)
The final row shows the icons for several devices:
- Smart Plug (AC grid voltage on/off switch with night light and timer)
- e-Sensor (temperature, humidity, light level, sound level)
- Rain Detect (door/window opening sensing, re-purposed and re-named as rain sensor)
The TR-RFISMW-AC Alarm Transceiver Hub
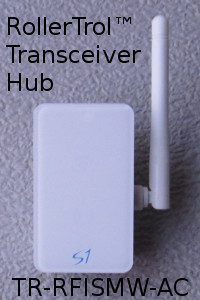 That very last item (Rain Detect) on the home screen is the icon that appears when you connect the TR-RFISMW-AC alarm transceiver hub to your wifi router (it contains the IFTTT alarm event reaction program). It will automatically appear on any phones or tablets in your system that have had the BroadLink app installed.
If you haven't already done it, please plug it into an outlet and connect to your router using the SmartConfig™ method; just enter your router SSID and password credentials. It will connect and retain those settings in non-volatile flash memory, so even if you have a power failure, it will automatically re-start when power is restored (as do all the units in this system).
This hub is the focus of this article series, receiving radio signals from the wireless door/window sensor. It manages the event logic and communicates with the rest of the system via WiFi, through your router.
If you missed the previous article about the motorized skylight rain sensor components, please consider reviewing that article first.
You can install as many of these hubs as you like (each with its own IP address), up to the limit of your router's capability (usually around 255). If you want more, you can just install another router.
Each TR-RFISMW-AC transceiver hub can manage up to 16 different IFTTT events, with 6 conditions and 8 actions for each event. In this example, we are monitoring 2 event conditions (rain start, rain stop), with one action for each event (keeping in mind that we are re-purposing the door/window sensor):
- Rain starts => close skylight immediately (normal detection is door closed)
- Rain stops => system beeps and pushes message alert to phones (door open)
Adding the Door/Window Sensor (re-purposed as input) to the System
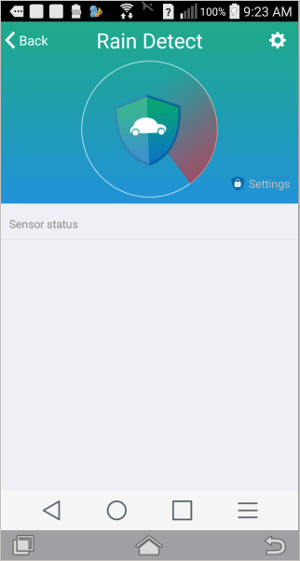
 When you first press the icon for the alarm controller hub (it won't be called that until you rename it), you'll see the screen at the far left, below. This is the main status reporting screen for the security alarm system.
There won't be any item listed (i.e. Rain Sensor 1) because you first have to add the re-purposed door/window sensor to the system and rename it. If you press the gear icon in the top right of the status reporting screen you will get a drop-down menu with 3 choices:
- Interaction
- Add sensor
- General settings
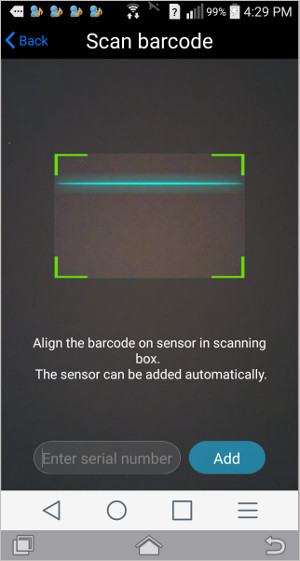
Press the Add sensor menu item and you'll get the second screen below. You'll see that your camera has been activated, with a small viewport showing on the screen.
You can complete this very simple process, simply by holding the QR label on the bottom of the door/window sensor up to your camera lens, so that you can see it in the viewport. As soon as you do this the system will automatically detect the sensor type and install it for you.
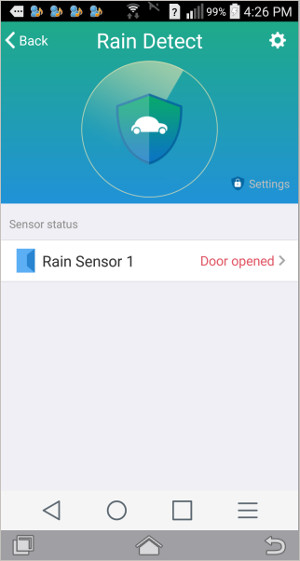
There is no need to enter anything or press anything, it will take you right back to the main status reporting screen, but now the sensor will be listed (see right hand picture below), and you can rename it in the General Settings area.
It really doesn't get any easier than that!
Re-purposing the DW-RFISM-3VB Wireless Door/window Open Detection Transmitter as an Input Device
 Please keep in mind that we are re-purposing the door/window opening sensor as an input device for the rain sensor.
If you missed the previous article about the re-purposing the door/window sensor as an input, please consider reviewing that article now.
At this point the output of the rain sensor should be soldered to the reed relay terminals inside the main body of the door-window sensor. When the rain sensor detects water droplets, it will close the circuit, emulating the reed relay behavior, which will trigger a 'window closed' radio signal to be transmitted to the transceiver hub. You can also still use the magnet to trigger the system as a test.
Where To Go From Here
If you didn't see the previous article series about using our HA-RFIRW-5V controller hub for home theater, you may be interested to review that series as this IFTTT rain sensor is an add-on to that system.
You can also see more info about our motorized skylight/window actuators here.
The next article discusses the software setup and IFTTT (if-this-then-that) configuration, using the rain detectors for our skylight openers as an example.
If you are interested, you can purchase these products in our DIY online store.
Articles in this Skylight Rain Sensor series:
Part 1-Motorized Skylight Rain Sensor: Introduction
Part 2-Skylight Rain Sensor Hardware Setup (you are here)
Part 3-Skylight Rain Sensor Program Event Handling
Also, see the follow-on series about our other companion devices:

 Shopping Cart Home - Start Here
 Remote Controls for Radio Equipped Motors
 DIY Starter Kits for Window Shades
 DIY Starter Kits for Window Openers
 ZWAVE Blind & Shade Controllers
 How To Choose the Right Blind & Shade Motor
 Select tubular Motor (Comparison table)
 Choose RollerTrol Battery & Solar Motors
 DIY Roller Blind Motors - FAQ
 How To Insert Blind Motors & Attach Brackets
 Calculate your Blind or Shade fabric Weight
 Select Tube Size for Blind Motor
 How to Insert Blind Motors Into Tube
 How to Insert Blind Motors Into Tube with Adapters
 Attach Mounting Brackets - Standard + Mini Series
 Attach Mounting Brackets - MAXI Blind Series
 How To Set Up Radio Equipped Blind & Shade Motors
 Series P Radio Remote Control Motors
 Series G Radio Remote Control Motors
 Series R Radio Remote Control Motors
 BroadLink RF/IR Hub System for Motors
 How To Set Up Window/Skylight Openers
 Introduction: Window & Skylight (K Series)
 BroadLink RF/IR Hub System for Motors
 Z-Wave Interfacing for Shade & Opener Motors
 Wired Wall Switch Control of Window Openers
 How To Use Alexa With Our Motors & Window Openers
 How To Use BroadLink Phone App Hub With Our Motors
 How To Set Up ShadeSlider Skylight or Bottom-Up Blind
 How To Retrofit RV, Boat and Motorhome Blinds
 How To Set Up Non-Radio Motors
 Operation & Travel Limits of Non-Radio Motors
 Make a Simple DC Motor Reversing Switch
 How To Set Up ZWAVE Control
 ZWAVE Controller for G Series Radio motors
 ZWAVE Door/Window Opening Detection
 ZWAVE Motion Detector with Temperature Sensing
 Motorized Window Blinds & Shades
 Motorized Dual Window Shade
 Make Motorized Blackout Blinds
 Phone-Tablet-PC Control for Motorized Blinds
 Mini Motor for Existing Shade Retrofit
 Roman Shade Retrofit
 Make a Motorized Window Opener
 Blind & Shade Motors for RV & Boats
 Make Your Own Projector Screen
 Curtain Closer: Ultimate Home Theater
 Wireless Battery Operated Drapery Motor Kit
 Make a Motorized Bottom-Up Shade
 Make a Motorized Skylight Opener
 BroadLink RF/IR Hub System for Motors
 Why Buy From US?
 Background & Mission Statement
 Customer DIY Testimonials
 Site Map - Search All Pages
 Why Buy From US?
 RollerTrol Users Forum
 Contact Page